


Most people think about waterproofing boots exactly once: the moment their socks are soaked through. That's the wrong time. But it's also fixable — and faster than you'd think. Whether you're on a job site dealing with puddles, mud, and morning dew, or just tired of cold wet feet by 9am, this guide covers the whole process. What to use, how to do it right, and what signs tell you the boots themselves are the real problem.
Why Waterproofing Wears Off And Why It's Not Your Fault?

Here's the thing most people don't realize: factory waterproofing doesn't last forever. It's not a permanent treatment — it's a DWR coating (Durable Water Repellent), and it degrades with every wear, every wash, and every UV exposure cycle.
After a few months of regular use, water stops beading on the surface and starts seeping in. The leather or fabric itself isn't necessarily damaged. The protective layer just needs refreshing. That's a totally different problem than cracked leather, broken seams, or a compromised membrane. And it has a totally different fix.
Do you work in a high-risk environment? Find out: Steel Toe Work Safety Boots: Expert Guide to Protection and Comfort
Step 1: Clean Your Boots First (This Step Actually Matters)
You can't treat dirty boots. The product won't bond correctly, and you'll seal in dirt and oils that accelerate breakdown.
What you need: a stiff-bristled brush, warm water, and a mild soap or dedicated boot cleaner. Avoid harsh dish soap — it strips oils from leather.
- Remove laces and insoles
- Brush off dried mud and debris
- Wipe down with a damp cloth and light soap
- Let dry completely — never treat wet boots
This last point trips people up. Applying wax or spray to damp leather locks in moisture. Give them at least a few hours, ideally overnight.
Step 2: Pick the Right Waterproofing Product for Your Boot Material

Not all products work on all materials. Using the wrong one can damage the upper or block breathability. Here's a quick breakdown:
- Full-grain leather boots: Wax-based treatments (like beeswax or Sno-Seal) are ideal. They restore natural oils while sealing pores. They do darken the leather slightly.
- Nubuck or suede leather: Use a spray-based treatment. Wax will clog the grain and ruin the texture. Look for a product labeled specifically for nubuck or suede.
- Synthetic and fabric uppers (nylon, mesh): Water-repellent sprays work well here. Products based on silicone or fluoropolymer chemistry (like NikWax or Grangers) work without damaging breathable membranes.
- Rubber boots: These don't absorb water by nature, but the seams can crack over time. A rubber conditioner or silicone spray on the seams is enough.
If your boots have a waterproof membrane (Gore-Tex, eVent, or a brand-specific liner), the DWR on the outer shell is what needs refreshing — not the membrane itself. A spray treatment is the right call there.
Step 3: Apply the Treatment Correctly
This is where most people rush. Take your time here — it makes a real difference in how long the protection lasts.
For wax/paste products:
- Warm the boot slightly with a hair dryer for 30 seconds — just enough to open the pores
- Apply wax with a cloth or fingers in circular motions, working it into the leather
- Pay extra attention to seams, stitching, and the welt (the join between upper and sole)
- Use a hair dryer to gently heat the wax into the leather after applying
- Buff with a soft cloth once absorbed
For spray products:
- Hold the can 6–8 inches from the surface
- Apply in thin, even passes — don't saturate in one go
- Let dry for 15–20 minutes, then apply a second coat
- Some sprays need heat activation — check the label
One area people consistently miss: the tongue. It's often uncoated and a main entry point for water. Treat it like the rest of the boot.
Step 4: Let Them Cure Before You Use Them
Wax treatments need 24 hours to fully cure and bond with the leather. Sprays are typically dry within an hour, but full effectiveness builds over 24 hours too. Don't wear them out in the rain immediately after treating. You'll just wash off the product before it's had time to set.
Once cured, do a simple test: hold the boot under a tap for a few seconds. Water should bead and run off cleanly. If it soaks in instead, you need a second application — or the upper material is genuinely worn through.
Discover this guide: Best Pull-On Work Boots for Plantar Fasciitis Relief
How Often Should You Reapply?

Every 3 to 6 months for regular heavy use. Less frequently for occasional wear. A useful visual cue: when water stops beading on the surface and starts spreading into the material, it's time to reapply. Don't wait until your feet are wet.
Some people do a quick spray re-treatment every month as maintenance. That's not overkill if you're working in consistently wet conditions — construction, landscaping, outdoor logistics.
The Limits of Waterproofing Treatment
Here's the part most guides skip. If the leather is cracked, the seams are pulling apart, or the midsole has separated from the upper — no waterproofing product fixes that. Water will get in through structural gaps, not just through the material itself.
The same applies to boots that have been badly contaminated with oil, fuel, or harsh chemicals. These break down the leather or synthetic fiber at a molecular level. You can re-treat the surface, but the structure is compromised.
In those cases, the honest answer is: it's time for new boots.And if you're working in a demanding environment and your boots are already struggling — that's worth thinking about before your next pair hits the same wall.
If You're Starting Fresh: Get Boots Built to Stay Dry
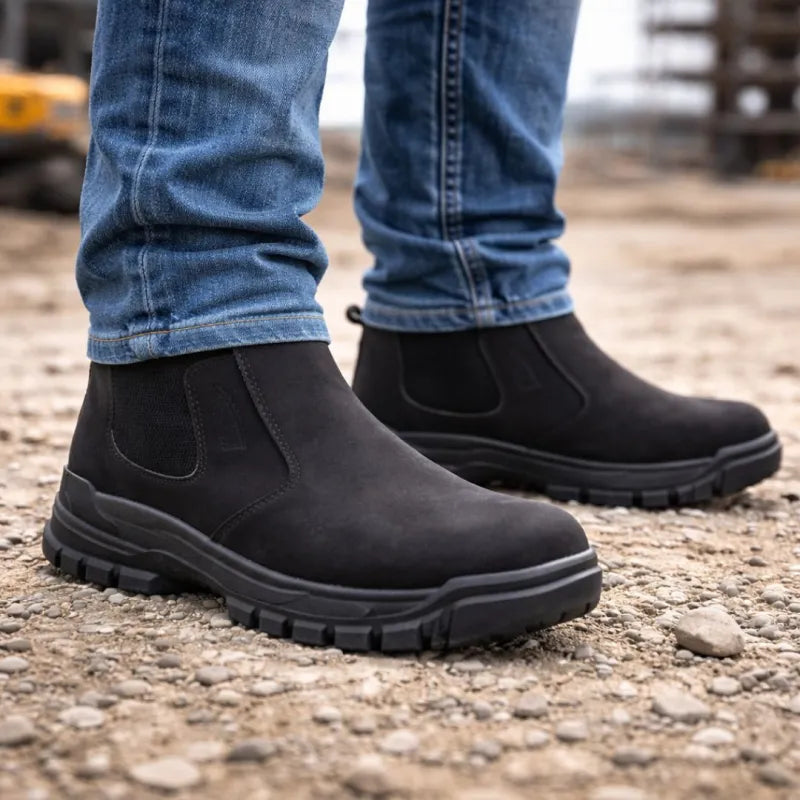
There's a ceiling to what surface treatments can do. The best waterproof boots start with materials and construction designed for it — not just treated on top. Two options worth looking at from Mason:
Waterproof Slip-On Composite Toe Boots
Built for people who want full protection without the weight or the laces. The waterproofing is structural, not a surface coating — meaning it holds up through real workdays, not just drizzle.
Key specs:
- ASTM F2413-certified composite toe
- Kevlar® puncture-resistant midsole
- Slip-on design, no laces or zippers
- 45% lighter than traditional safety boots
- Orthopedic insole for all-day wear
- Shock-absorbing outsole
The composite toe is worth noting specifically. It's non-metallic — so no cold transfer on winter mornings, and no conductivity issues on electrical or technical sites. You get the same impact rating as steel with less weight.
Construction workers who've switched from laced boots consistently mention the same two things: faster mornings, and feet that don't ache by afternoon. That's the lightweight design and orthopedic insole working together.
See the Waterproof Slip-On Composite Toe Boots
Atlas® Polar S3 Winter Safety Boots
For outdoor and winter conditions — job sites exposed to cold, snow, and wet terrain — the Polar S3 takes a different approach. Thermal insulation built into a fully waterproof boot, with S3 certification for steel toe, puncture-resistant midsole, and slip-resistant outsole.
Key specs:
- S3 certified (EN ISO 20345) — steel toe, puncture resistance, SRC slip rating
- Thermal insulation for cold environments
- Waterproof construction throughout
- Reinforced support and stability on uneven terrain
- Slip-resistant traction on snow and wet surfaces
The difference between this and just waterproofing regular boots in winter is significant. Insulated waterproof boots are designed to manage both moisture ingress and heat retention at the same time. A treated boot handles one of those — at best.

See the Atlas® Polar S3 Winter Safety Boots
How to Waterproof Boots: Quick Recap
- Clean boots thoroughly before any treatment
- Choose the right product for your boot material
- Apply carefully — seams and tongue included
- Let cure 24 hours before exposing to rain
- Reapply every 3–6 months, or when water stops beading
- If the boot structure is compromised, no treatment saves it
If your current boots are holding up, treating them regularly is simple and worth it. If they're at the end of their run — or you need something built for wet conditions from the ground up — the options above are a solid starting point.
